In this article, we’ll setup a dead simple web project that has live reload using Webpack.
So when I was starting a new project the other day I wanted to get a live reload setup in place so that whilst updating my source files, the app updates as if by magic straight away in the browser.
There are already lots of NPM packages that will give you a simple HTTP server with live reload but I wanted to do this with Webpack as ultimately i’ll be using this to bundle and build my app.
So in this article, i’ll take you through step-by-step the process I used to setup up a dead simple live reload project with Webpack using the webpack-dev-server package.
TL;DR You can get a copy of the files from the GitHub repo I setup at https://github.com/codebubb/webpack-livereload-example
OK, so first of all setup a new project.
mkdir webpack-live-reload && cd webpack-live-reload
npm init -y
Then add the Webpack dependencies to bundle and reload our app.
npm install --save-dev webpack wepack-cli webpack-dev-serverThen we need create a webpack.config.js file and provide some configuration for Webpack.
const path = require('path');

module.exports = {
  output: {
    path: path.join(__dirname, '/dist'),
    filename: 'index.bundle.js',
  },
  devServer: {
    hot: false,
    contentBase: path.join(__dirname, 'src'),
    compress: true,
    port: 3010,
    watchContentBase: true,
    publicPath: '/assets/',
  },
};
This is usually the bit where most people (including myself!) start getting confused with all the myriad of options available to use with Webpack.
Let’s break it down.
First we set our output path and filename for the bundle that Webpack will create. This is only really needed for when we build our project with Webpack however this gives us an opportunity to set the filename for the bundle which Webpack actually uses to create an in-memory version of the bundle which we can use with our dev server.
const path = require('path');

module.exports = {
  output: {
    path: path.join(__dirname, '/dist'),
    filename: 'index.bundle.js',
  },
};
The second part of the config is all about configuring the webpack-dev-server.
  ...
  devServer: {
    hot: false,
    contentBase: path.join(__dirname, 'src'),
    compress: true,
    port: 3010,
    watchContentBase: true,
    publicPath: '/assets/',
  },
  ...
Here we must either disable the hot option for hot module replacement to be false or the watchContentBase option for watching static files (like HTML) to true in order for the live-reload server to work.
Other than that we can configure the port and other options here and setting the publicPath allows us to reference that in-memory bundle that Webpack will create for us.
Let’s create a couple of source files to get our project up and running.
mkdir src && cd src
touch index.html
touch index.js
We can leave the .js file empty and we need to reference it in the HTML file in order to get the link to Webpack and setup the live reloading.
<!DOCTYPE html>
<html lang="en">
<head>
<meta charset="UTF-8">
<meta name="viewport" content="width=device-width, initial-scale=1.0">
<title>Document</title>
</head>
<body>
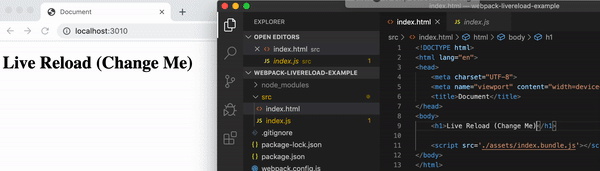
<h1>Live Reload (Change Me)</h1>
<script src='./assets/index.bundle.js'></script>
</body>
</html>The final thing to do is to setup a run script to call the dev server.
In your package.json file:
 "scripts": {
    "serve": "webpack-dev-server --mode development"
  },
And voilà! We can change our index.html page and get live updates in the browser!